User Guide

Getting Started with Cherry Proxy

Global Proxy

How to use username:password?

This article will introduce you to using residential proxies through username:password verification, let’s get started!


Step 1 Select proxy location


First, let’s look at this part of the picture below. You can choose a random proxy location, or you can search and select a precise country. Click View Country Code on the right to retrieve the corresponding country code.


Step 2 Select host, port and session type


Here, you can choose a hosting port in Singapore, the United States, or Europe.


Select [Sticky IP] in the session type.


When selecting sticky IP, you can set the IP usage time, ranging from 1-1440 minutes (24 hours).


Step 3 Test whether the proxy connection is normal


After editing your username and password, you can paste the cURL (a cross-platform tool) example into the command line or terminal to quickly test your proxy settings.


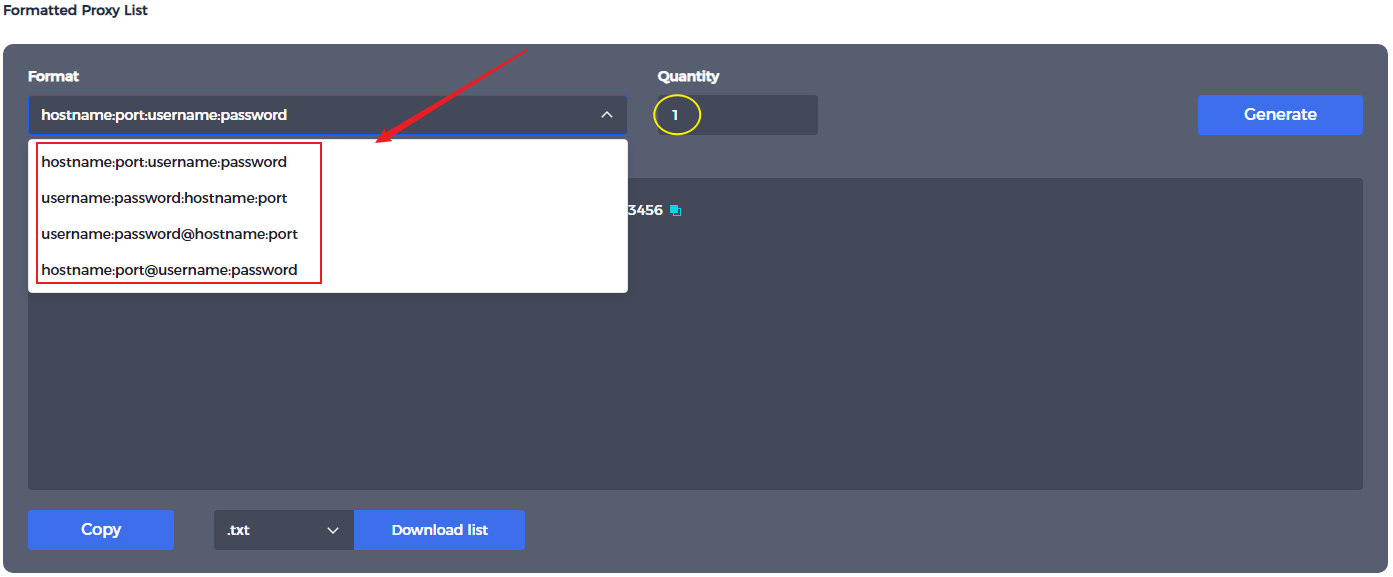
Step 4 Generate proxy list


Here you can select the format and quantity of proxies. The quantity range is 1-10000. Click Generate to output the proxy list. You can copy it directly into any application or tool, or generate a .txt or .csv file that can be imported into other tools.

Example:


1 host

2 ports

3 username

4 countries

5. Sticky IP usage setting time

6 password


The above is the entire introduction to the username and password verification methods. If you still have questions or want to seek help, please contact us via official email. We will do our best to solve your problem! Email: [email protected]