User Guide

Getting Started with Cherry Proxy

Global Proxy

Google Chrome


Step 1

Configuration proxy


Step 2

Download and install Google Chrome


Step 3

1. Install the proxy extension SwitchyOmega on the browser

Choose any of the following methods

①. Install from the Google App Store

②. Click to download the CRX installation package


2. Change the crx file extension to.zip or.rar and decompress the CRX file to a folder


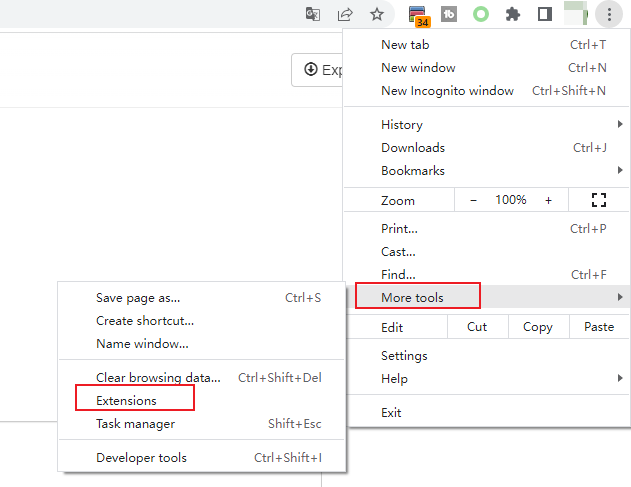
3. Open the Google Chrome Toolbar - More Tools - Extensions


uploads/img/202303640088185c980.png


4. Go to Developer mode - Click Load unpacked- select the already decompressed folder SwitchyOmega_Chromium


uploads/img/202303640088363dfff.png


Step 4

Add proxy Settings to the browser


1. There are two examples of proxy server and automatic switching module by default. You can modify them directly.

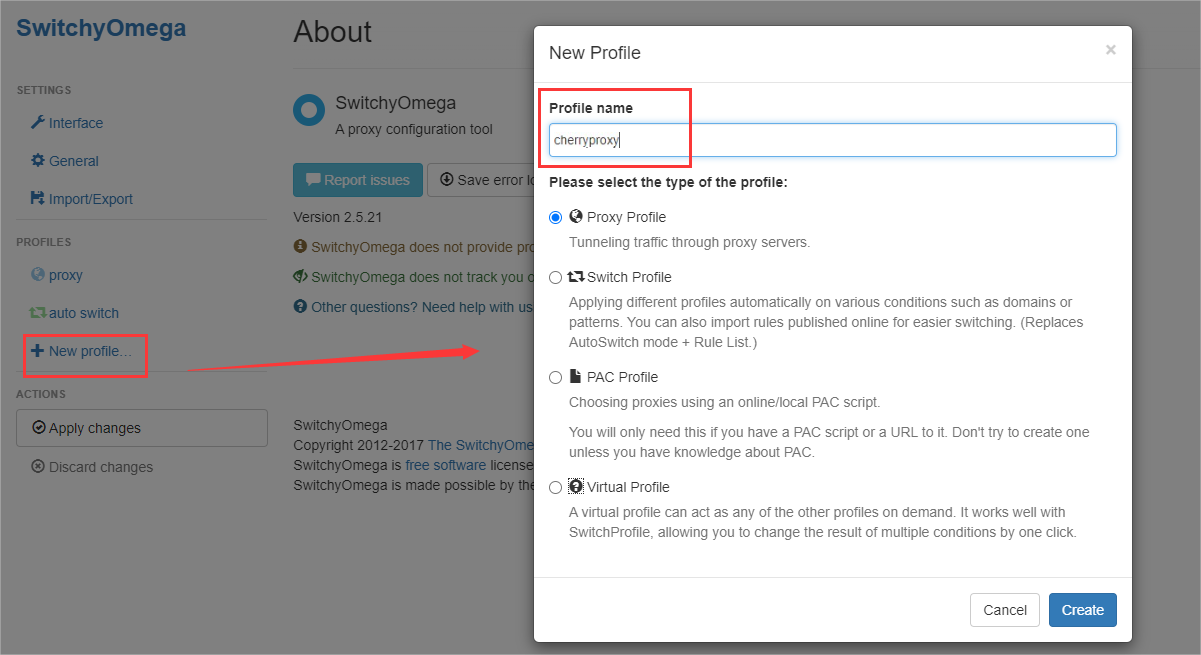
2. You can also click New Configuration File to create a new scenario model, enter a name, and click Create.


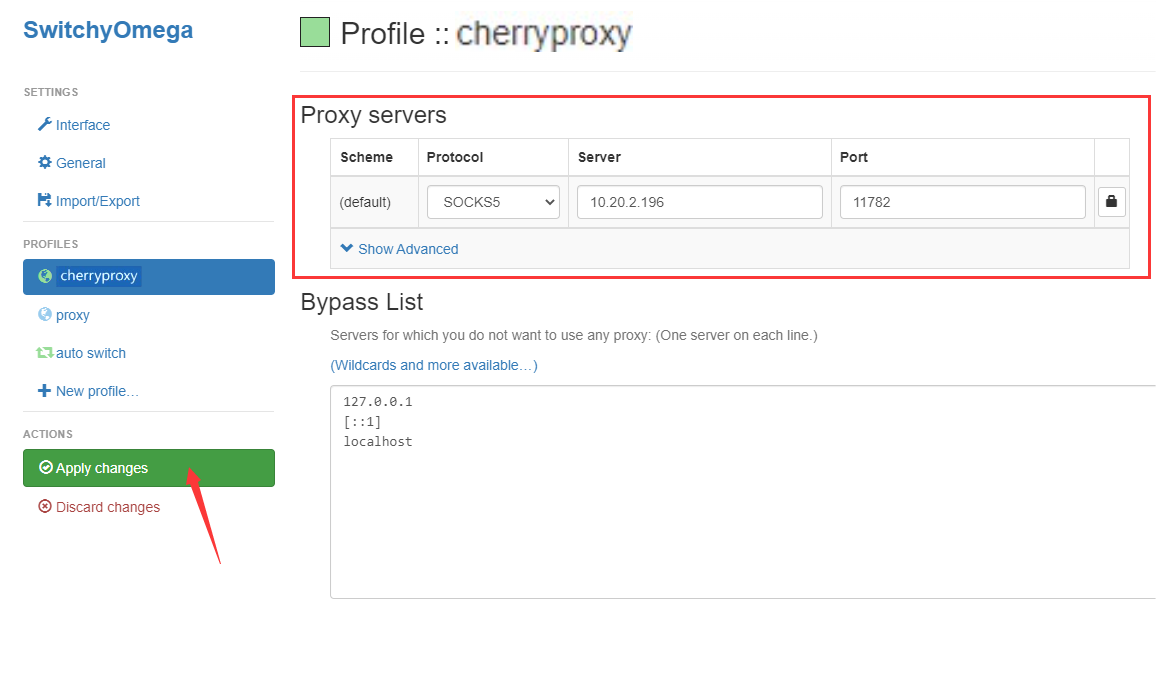
3. In the newly created configuration file, select SOCKS5, enter the local IP address and port number, and click Apply Changes.


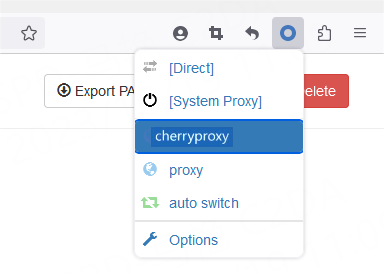
4. Click the extension icon in the upper right corner of Chrome to open SwitchyOmega. To use it, select Cherry Proxy profile; If this parameter is not used, Cancel Direct Connection Cherry Proxy.