User Guide

Getting Started with Cherry Proxy

Global Proxy

Choose to subscribe and start using

Get started:

First, you need to register an account on the Cherry Proxy official website https://www.cherryproxy.com).


Residential Proxies:

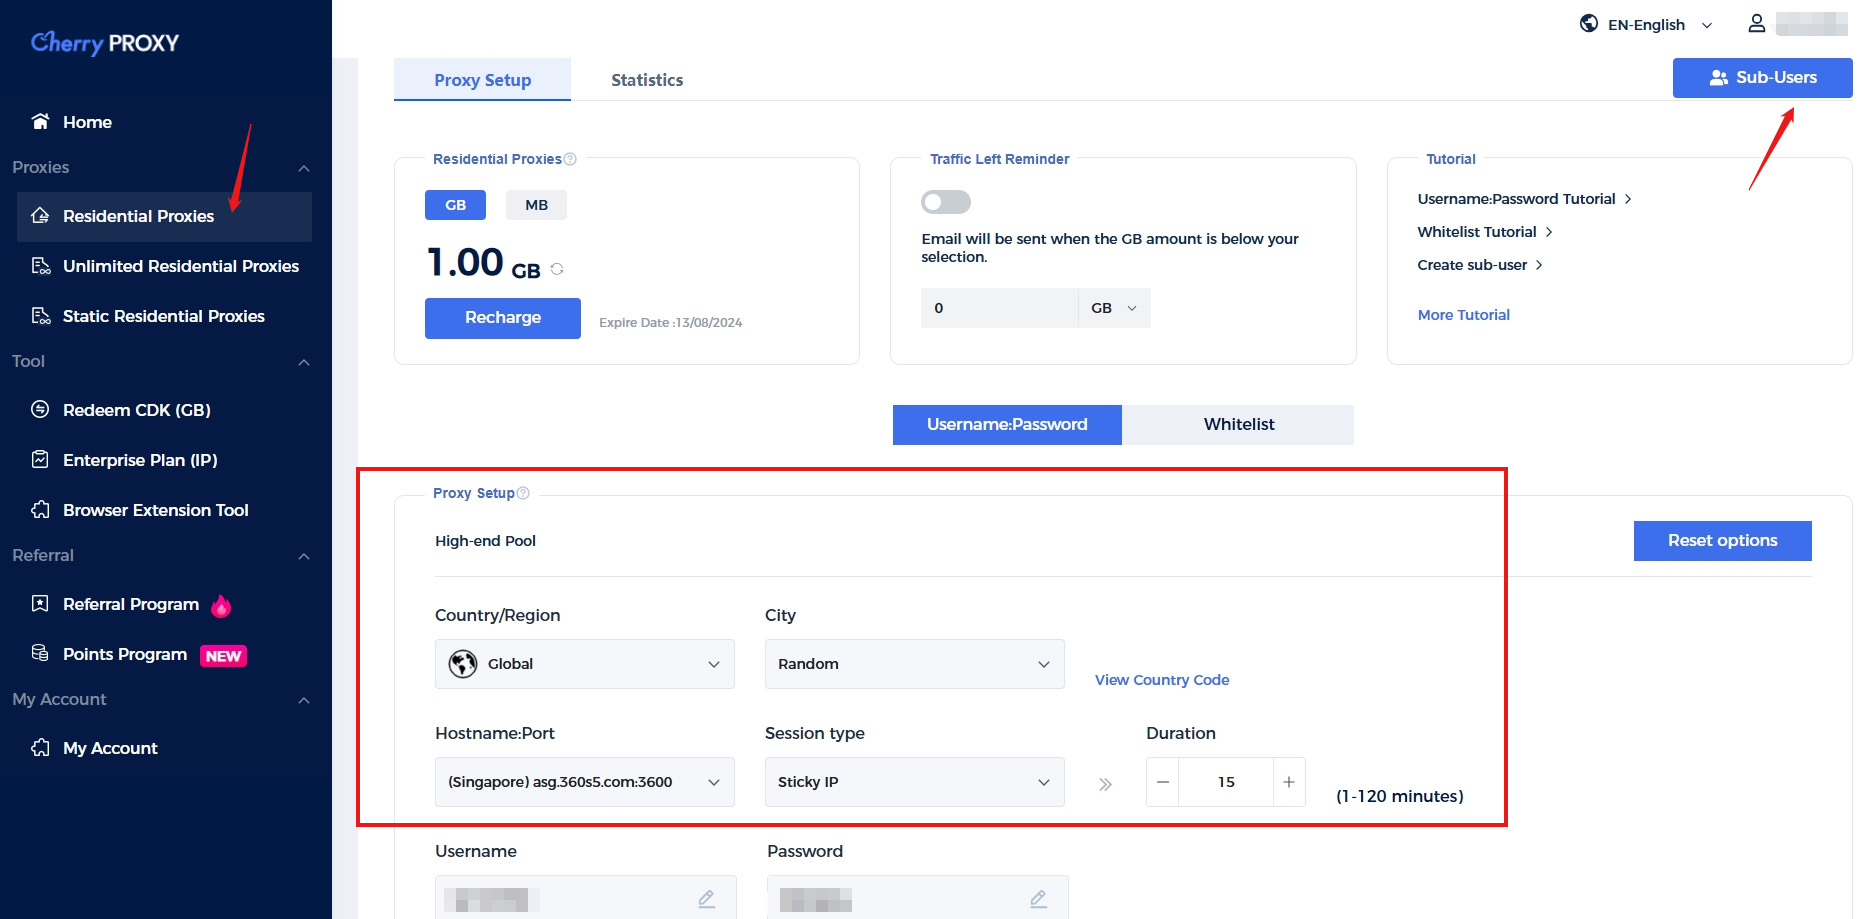
Step 1: Open the Cherry Proxy official website, log in to your account, and select "Dashboard" - "Residential Proxies" to create and use;You can also create sub-accounts according to your own needs.

Step 2:  Select the "country" and "city" IP you need;

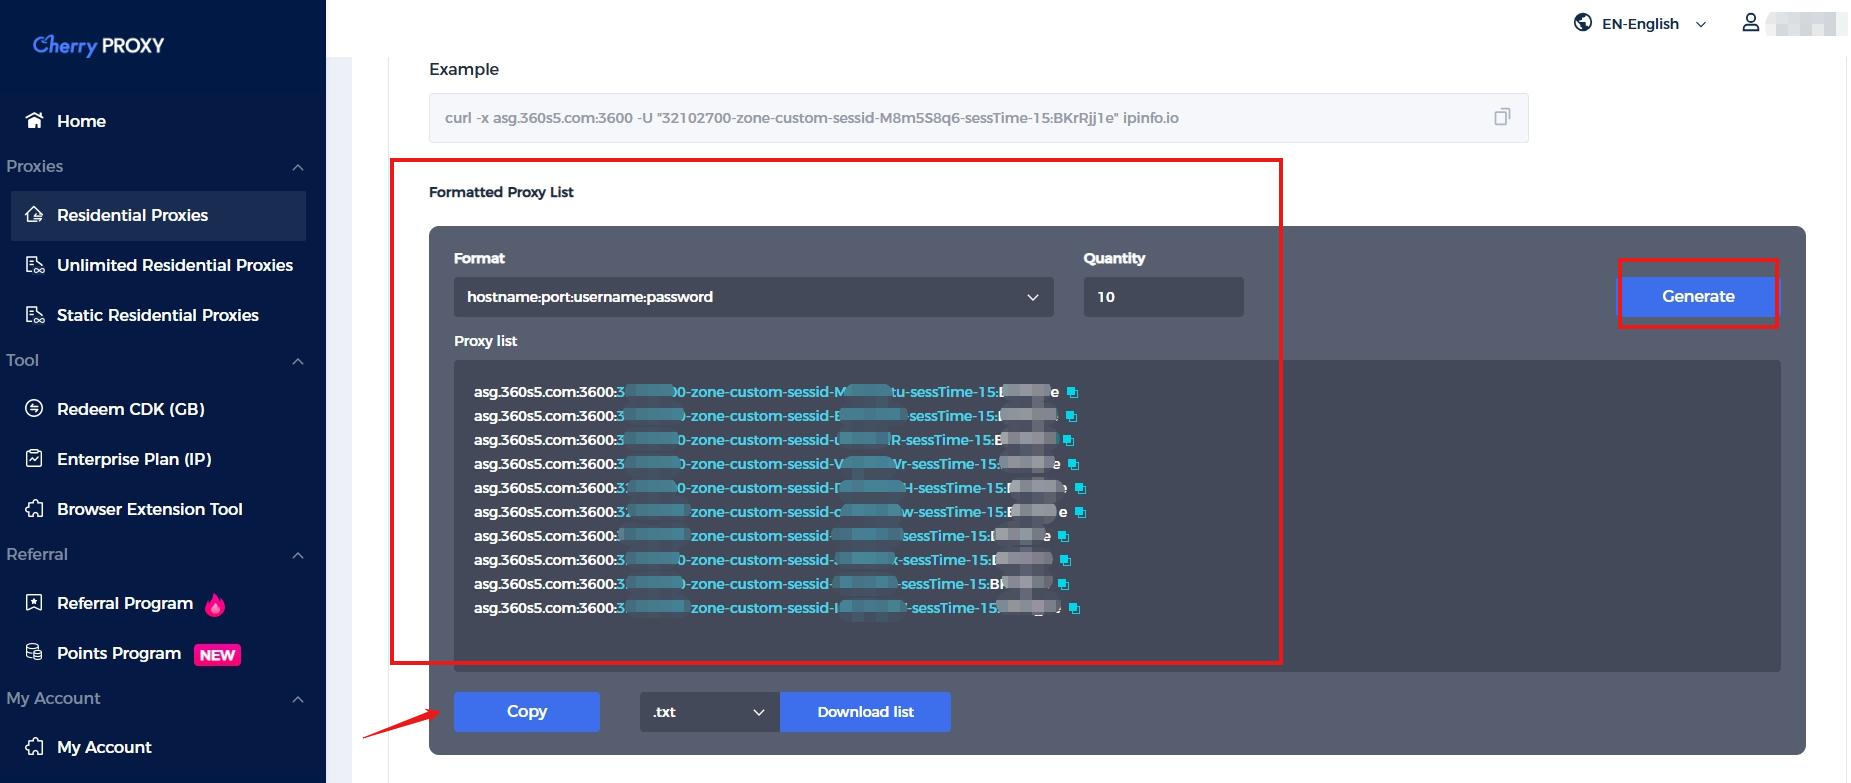
Step 3:  Select the required number of IPs, click "Generate", then click "Copy" to obtain the required test commands!


Socks5 Proxies

Step 1: Download and open the Cherry Proxy software and enter your username and password to log in to your personal account.

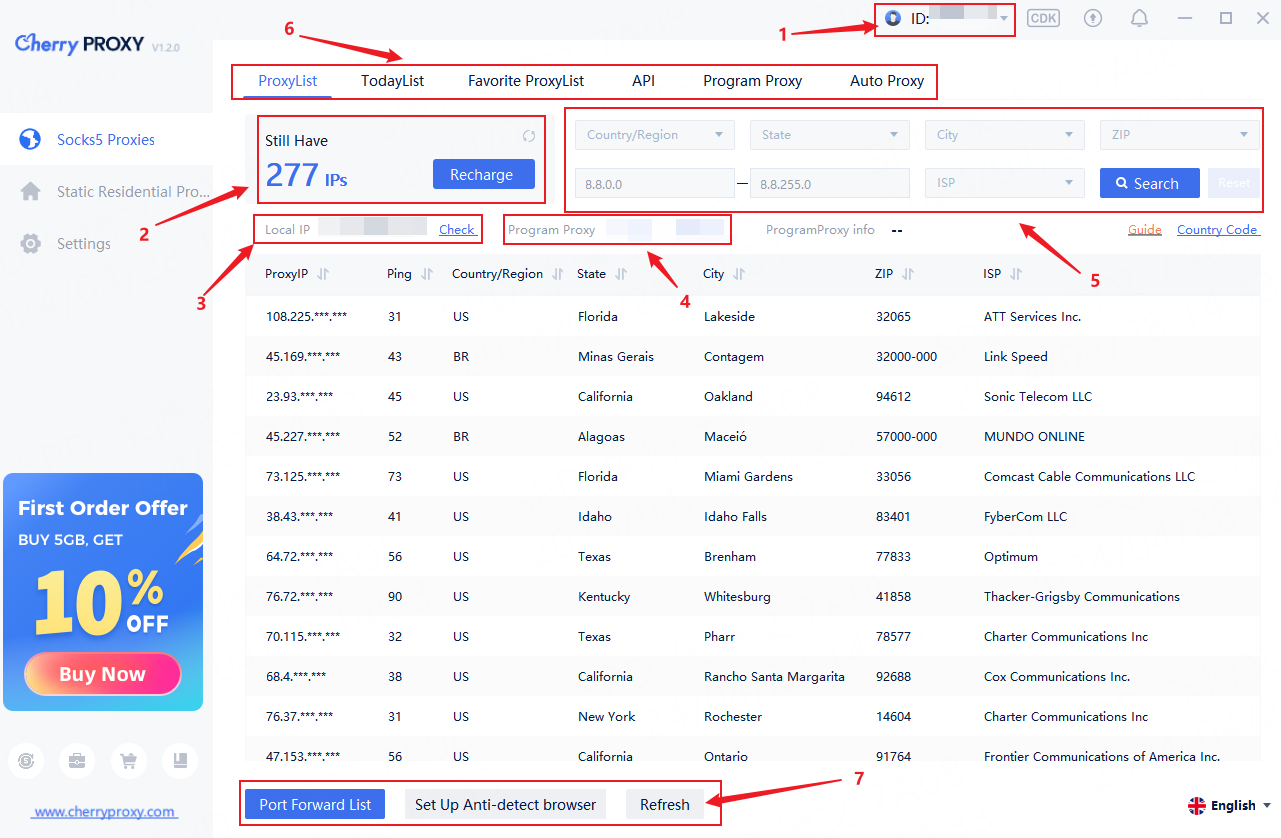
Step 2: You can filter the required proxy IP by selecting country, state, city, postal code, Isp, and customize the IP segment. Relevant codes can be found in the "country code" below.

Step 3: Click on the 'Search' button. After the retrieval is completed, you can also click the "Refresh" button to update the IP list information.


Socks5  Proxies Introduction to the software:


① Personal Center

② IP account balance

③ Local external IP address

④ Local intranet and ports

⑤ Filter country, state, and city, support postal code search and optional IP segments

⑥ IP Proxy Function Filter

⑦ Port forwarding address details&ISO country code table


Static Residential Proxies


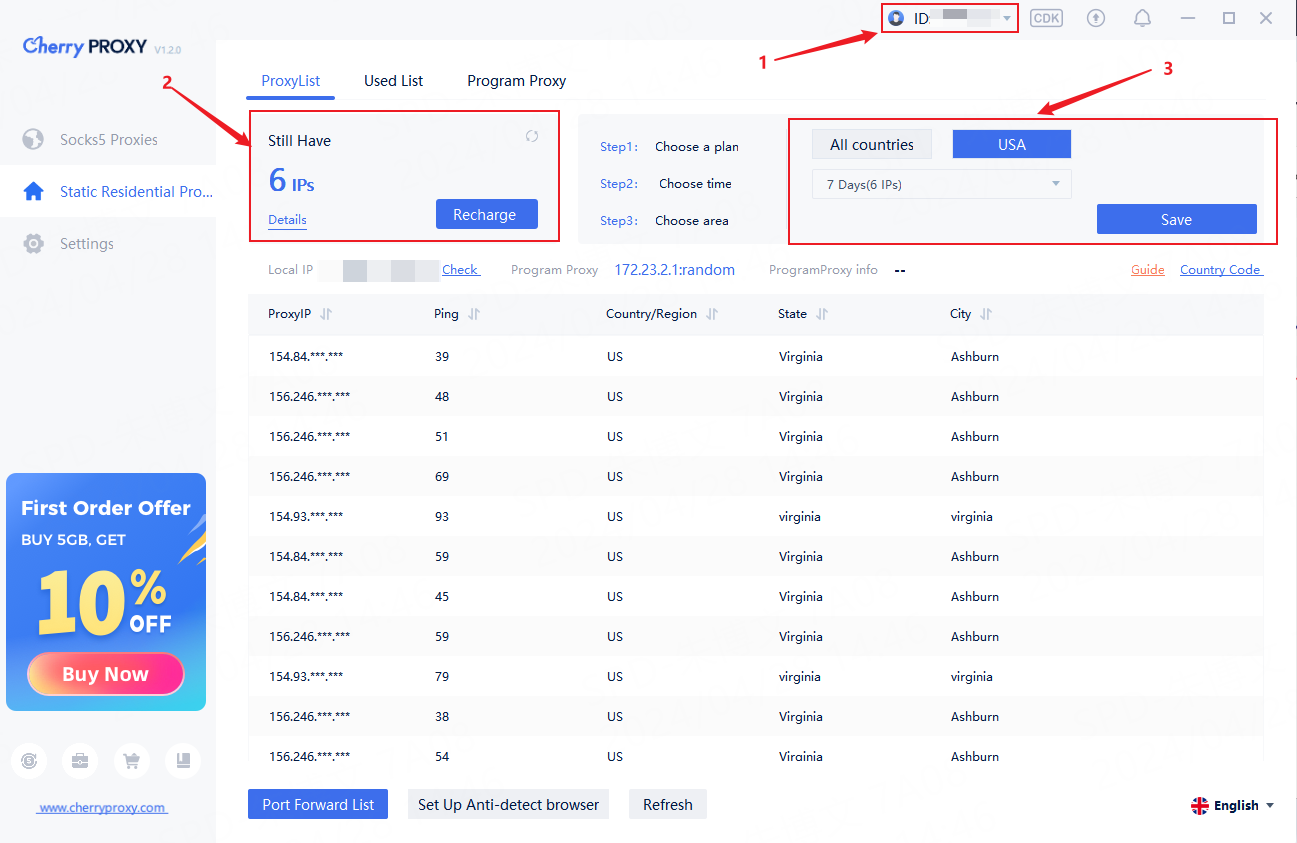
① IP Proxy Function Filter

② IP balance of static proxy

③ Select static proxy IP for the United States/all countries